

 Michael’s Corner #133
April/May 2014
Earth, Wind, & Fire (or in AutoCAD-speak: Layers, Text, & Solids)
When this goes to press, Autodesk's flagship product will probably be on the streets, and there will be dozens of blogs and websites trumpeting the new features. Rest assured, I will also be taking a look at what piques my interest, but what we have in these articles is another round of ‘under the hood’ features from training sessions since the beginning of the year. And as it turns out, all of these were procedures and features I wondered about, but had never taken the time to pursue… until now. Perhaps these are some things you have pondered, as well:
…How to use the Chamfer command with different Distance values on a 3D solid
…Why the OSMODE variable is different, even if you use the same Object Snap combination of modes
…What can be done about Find and Replace being applied to all the text in my drawing
…The Layer feature to set a layer to current by selecting an object
And given the track record of this past winter season… I fully expect snow in Kentucky in June. Hopefully, that won't be the case and Spring and Summer will get some traction and bring in more seasonal temperatures. The precipitation may be an entirely different issue. At least you can enjoy a new version of AutoCAD, whatever it decides to do outside!
If you would like to contact me directly, you can do that also.
Blessings to one and all,
Michael
Apply a Chamfer to a 3D Solid
When you apply a Fillet radius to a solid, you have one line to select and the fillet goes on; like running a router around the surface of a cabinet or coffee table you're making in the shop.
A Chamfer, however, has two Distance values that are applied—Distance 1 and Distance 2—and the sequence is important when selecting the surface for each distance.
How to Apply an Unequal Chamfer to a Solid
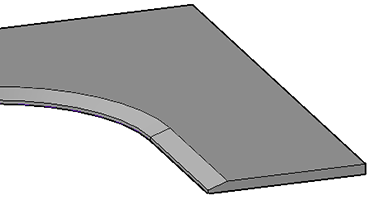
 Create a 3D solid using your method of choice (see Michael's Corner July 2012). In this example, I'm using a corner worksurface that has a thickness of 1-1/2″ for clarity purposes.
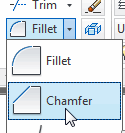
Launch the Chamfer command [Home tab
 Modify panel], then enter (or pick in AutoCAD 2013 & 2014) the Distance option.
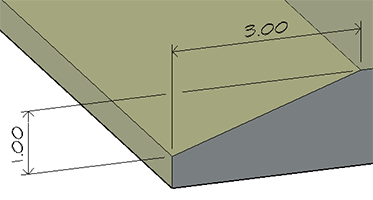
In this example, I'm setting the ‘first chamfer distance’ to 3″.
The ‘second chamfer distance’ will be 1″ in this example.
 When prompted to select the first line, I'm picking the top front edge of the solid. Since two surfaces join at that line—the top and the front—AutoCAD highlights one of the surfaces and presents you with the following prompt:
Enter surface selection option [Next/OK (current)] <OK>:Since I want the first distance of 3″ to be applied to the top surface, I'll enter N for Next. The top surface is then highlighted.
Press [Enter] for the OK option when the desired surface is highlighted. That is considered the ‘base surface’.
After the surface has been specified, you are prompted for the distance (curiously), with the value being your previously specified value for ‘first chamfer distance’ in Step 3, above. Press [Enter] to accept the default value for the base surface.
You are then prompted for the chamfer distance for the ‘other surface’, and the default is the (previously specified) value for ‘second chamfer distance’. Press [Enter].
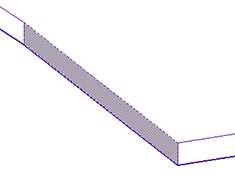
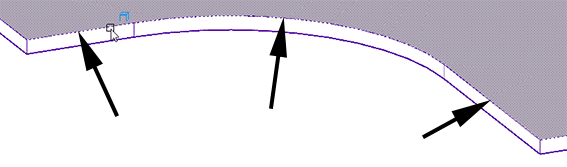
The next prompt—Select an edge, or [Loop]—is prompting you to pick the lines defining the edge(s) where the chamfer will be applied. In this example, I selected the three top edges of the front surfaces of the solid as indicated in the illustration.
Press [Enter] after selecting the edges and your chamfer is applied!

Power Tool
Focused Find & Replace
The Find and Replace feature is a Godsend to many, but sometimes you may want to rein in some of the text objects it searches for. In the following exercise, I'm modifying all instances of an attribute value, but not any other text objects—Single-line text, Mtext, text in Xrefs, etc.—that have that same value.
How to Put a Focus on Find & Replace
Launch the Find command [Annotate tab
Text panel].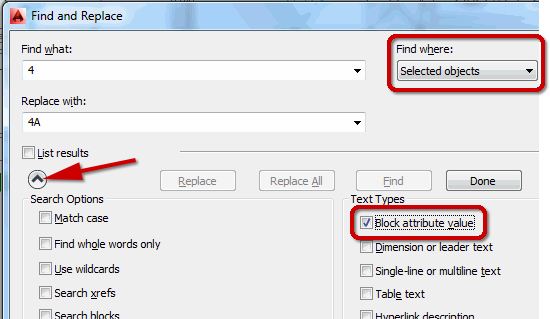
Enter the value for Find what and your Replace with text.
Now, click the More Options button on the bottom right to display the available search options.
Clear all the check boxes except in the Block Attribute Value (or whatever text type you're finding), then click Replace All.
Note: You may want to specify a refined area of the search by changing the Find Where area in the upper right corner.
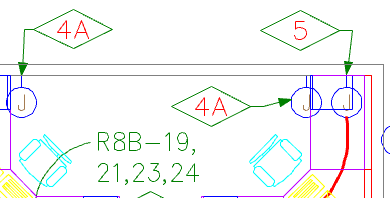
In the illustration, notice the attributes displaying 4A have been changed, but not the Mtext object containing the string ‘…23,24’.
The Odd Spot
OSMODE: With and Without Osnap Enabled
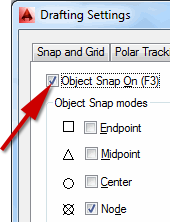 Back in Michael's Corner, March 2012, I wrote about adding a button to the Quick Access Toolbar to set the Osnap to Node Snap only. Briefly, when you pick the Object Snap modes you like to use—Endpoint, Node, Center, etc.—the variable OSMODE assigns that collection a number. The OSMODE number for the condition displayed in the illustration—Object Snap On and Node snap only—is 8.
But in a training session last week, Amity bumped into something that I had actually wondered about, but never pursued. Specifically, your OSMODE number will be different if you don't have the box checked for Object Snap On!
| Node snap only + Object Snap On: | OSMODE = 8 |
| Node snap only, but Object snap Off: | OSMODE = 16392 |
Bottom Line: When finding your OSMODE number to create a button to automate the settings, make sure you have Object Snap On first, then type OSMODE… and that's your number!
The Basics
To or From the Current Layer
There are two really handy buttons on the Layers panel—Make Object's Layer Current and Change to Current Layer.
Make Object's Layer Current
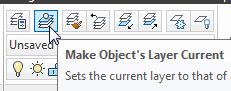 Use this command to set the current layer by selecting an object that's on the layer you want to be current.
Ex: You just added the topographic lines to the site plan on the TOPO layer, and now you need to add more notes to the NOTES layer. Click Make Object's Layer Current, click on some text that's on the NOTES layer, and that becomes the current layer.
Change to Current Layer
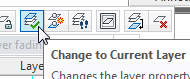 This is a great editing feature when you need to move objects from one layer to another.
Ex: The NOTES layer is current as you add text to the drawing and discover text objects that are a different color. So you hover over the object to display the rollover tip where you see it's on the wrong layer. Click Change to Current Layer, then select the errant objects and press [Enter] to change them over to the NOTES layer that happens to be current.
Left Field
So Just How Cold Was It?: Lake Superior in North America—the largest of the five Great Lakes—is the largest body of fresh water in the world, and this winter the extent of ice covering that immense lake hit 95.3%. The Great Lakes, as a whole—Huron, Ontario, Michigan, Erie, and Superior—are 88% frozen over. This is the largest area of ice coverage they have experienced since 1994; a coverage of 82,940 sq. mi. [214,814 sq. km.]
Donate to CADTutor
If you found this article useful, you might like to consider making a donation. All content on this site is provided free of charge and we hope to keep it that way. However, running a site like CADTutor does cost money and you can help to improve the service and to guarantee its future by donating a small amount. We guess that you probably wouldn't miss $5.00 but it would make all the difference to us.
Note from Michael: I want to thank all of my customers for continuing to retain my training services (some for over three decades!) and let you know your donations do not go to me personally, but to the ongoing maintenance of the CADTutor ship as a whole and to support the yeoman efforts of my friend and CADTutor captain, David Watson, to whom I am grateful for this monthly opportunity to share a few AutoCAD insights.
Share this page:


The Basics
- Dual Dimensions in a Dim…
- UCSICON Options
- "Best of" Basics: Irreg…
- Tool Palette Basics
- Original Dimension Value
- Possible Solutions to th…
- Avoid Using 'Standard' i…
- Shorten the Plot Scales…
- Update the Source File B…
- User Increment Angles fo…
- Drawing Information
- 'Sign Language'
- Rotate with the Copy Opt…
- Use the INSERT Osnap on…
- To or From the Current L…


