

 Michael’s Corner #80
August 2009
7th, 8th, and 9
I was just sitting here thinking about the history of this particular column, and realized this is the 7th year I've been writing this column, and we're now in August (the 8th month) of 2009. Which then reminds me of my favorite Chinese restaurant , 4-5-6, in San Jose, CA where I like to go with friends when I'm out there.
To bring things back in focus, this month we have…
…How to add a new Tab and Panel to the A2010 Ribbon. (I'll be showing this in my Lab at AU this year.)
…A new tool palette button to insert your favorite Layers, Text Styles, Dimension Styles, etc. into any drawing.
…The Menu Browser's "Access Date" feature, ala the old "AutoCAD Today" interface.
…Applications and benefits for the Quick Properties window.
Hope you're having a wonderful summer! (…ah, unless you're in the southern hemisphere like my buddy, Hugh Bathurst, who is desperately in need of the sunshine so he can get back on those waves off the coast of Melbourne.)
If you would like to contact me directly, you can do that also.
Blessings to one and all,
Michael
Adding a New Tab and Panel to the Ribbon in A2010
If you want to set one of the buttons of your car radio to a specific station, you have to actually be in the car with the radio on. Similarly, if you want to add a Panel to the Ribbon, you have to make a Tab for the panel to "live" in. The exercises are created in AutoCAD 2010; A2009 is similar. Hang on tight, here we go.
Important: Since the Ribbon is directly associated with a Workspace, I would (highly) recommend you save your current workspace if you haven't done so already. Then use Workspace Switching![]() Save Current As again and make a workspace that is exclusive to this exercise. My Workspace name for this exercise is Add a Tab & Panel.
Save Current As again and make a workspace that is exclusive to this exercise. My Workspace name for this exercise is Add a Tab & Panel.
Instructions to Create a New TAB on the Ribbon
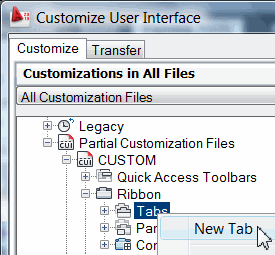
Open the CUI from the Manage tab of the Ribbon, or just type CUI.
Navigate to Partial Customization Files
 CUSTOM, then expand the Ribbon node. [The CUSTOM node is the optimum location for your customized menu components as these will be retained if AutoCAD needs to be re-installed or if when you upgrade to the next version.]
Under the Ribbon node, right-click on Tabs, then click New Tab and enter a name. In this exercise, I'm naming it CT-AUG09.
Instructions to Add a PANEL with Commands to the TAB
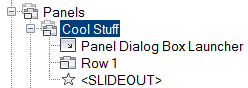 Under the Ribbon node, right-click on Panels, then click New Panel and enter a name. In this exercise, my panel name is Cool Stuff.
Note: Under your panel name, you will see three default components: Panel Dialog Box Launcher, Row 1, and <SLIDEOUT>. In the next step, you will put commands in Row 1 for this panel.
-
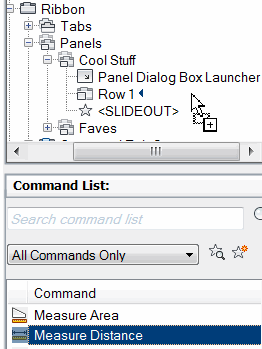 Similar to adding commands to a toolbar (see December 2008 & January 2006), from the Command List, drag and drop your favorite command(s) up and release it next to Row 1.
 Then, after populating Row 1 with commands, drag your "Cool Stuff" panel up, and drop it beside your tab.
Instructions to Update the WORKSPACE with the New TAB
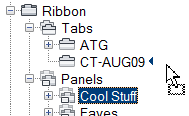
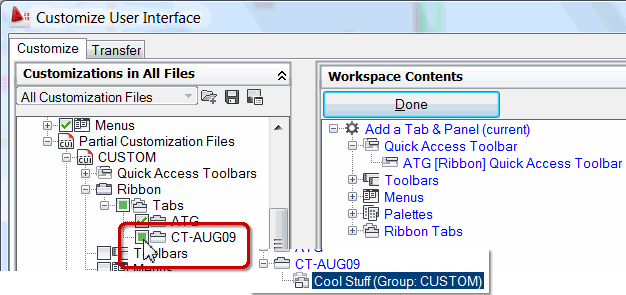
To have your new tab (with the associated panel) recognized in your workspace, go back up to the Workspaces node and click the name of the workspace where you want this tab & panel to (mine is current). You will now see the Workspace Contents area in the upper right quadrant of the CUI.
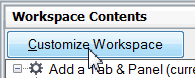 Under Workspace Contents, click Customize Workspace.
Under CUSTOM (where you made your tab and panel), put a check in the box beside your newly created Tab. You will now see your new tab Ribbon Tabs listing of your Workspace Contents.
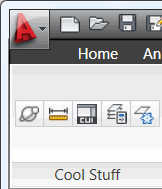
Click Done, then click OK to apply and close the CUI, then check out your new tab!
 Note: If you want to add more commands to your panel, just open the CUI, go to CUSTOM and expand your Panel, then drag and drop commands onto Row 1. When you apply the changes and close the CUI, your panel will be updated with the additional commands!
Power Tool
Custom Button #13: Insert Your Favorite Settings From a Button
 You open a drawing and want to add a note… but your company's recommended layer and text style are not in the drawing. Or say you're just reviewing the drawing, and need to add a Revision Cloud… but the layer you like to use isn't there.
There are two ways of working with AutoCAD: Begin a New drawing - possibly using your template (.DWT) - or open an existing drawing. When you use a template, ideally, your favorite layers, text styles, dimension styles, etc. are already there.
Note: You can go to Michael's website on the "AutoCAD Stuff" link and download his sample template. Also, for coverage on creating a template and its contents, see Basics, February 2004.
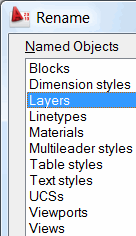
But when you open someone else's drawing, the Named Objects from the template aren't there. (For coverage of the Rename dialog box which lists all the values for the current drawing's named objects, see Power Tool, June 2003).
This month's tool palette button automates the loading of your favorite settings.
Here's What We Know
The Template (.DWT) has all our favorite settings (named objects) for Layers, Text Styles, and Dimension Styles.
The Insert command enables you to insert a DWG into your current drawing.
When a drawing is inserted, the named objects of that drawing are added to the list of existing named objects.
Therefore, if we could make a .DWG from our .DWT, we can then make a button to Insert that DWG!
The Goal: To insert the CT_Master drawing into the current drawing.
The Problem: The Insert command opens the Insert dialog box… and a macro will come to a screeching halt.
Instructions to Prepare and Create a Button to Insert Your Settings
Begin a new drawing with your template.
Save that drawing to your AutoCAD's ..\Support folder as CT_Master.DWG, or with whatever name you prefer.
Note: The reason I'm having you put it in the ..\Support folder is because that folder is typically in the default collection of support file search paths. (Options
Files Tab, Support File Search Path). If you have another location where you would prefer to save this file, be sure that location is added to (or already exists in) the Support File Search Path collection. This will save a step when creating the Command String for the button.Open the Tool Palette window, then you will need a blank button to work with (see Michael's Corner Odd Spot, April 2007).
Right-click on the blank button, then click Properties.
Edit the Command String field to read as follows:
^C^C-INSERT;"CT_Master";0,0;1;;;
To suppress the dialog box and issue the command line version of a command, you can place a hyphen in front of the command; in this case –INSERT. The following are the prompts you will see along with the responses you have in the macro.
Enter block name or [?]: "CT_Master"
Specify insertion point or [Basepoint/Scale/X/Y/Z/Rotate]: 0,0
Enter X scale factor, specify opposite corner, or [Corner/XYZ] <1>: 1
Enter Y scale factor <use X scale factor>: [Enter]
Specify rotation angle <0>: [Enter]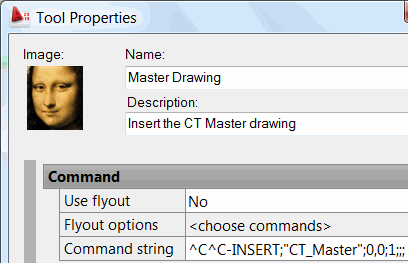
-
Enter a Name and a Description (optional) for this tool, then click OK. Ah, and if you right-click on the empty image location, click Specify Image and go find one of five different raster image file types.
To test it, open any drawing that doesn't have the layers, etc. from the master drawing, then click the button… then check the layer list!
The Odd Spot
Drawing Access Date in the Menu Browser
 Once upon a time, in a version of AutoCAD long ago, when you launched the program you got something called (I think) "AutoCAD Today" where you could display a chronological order of your drawings.
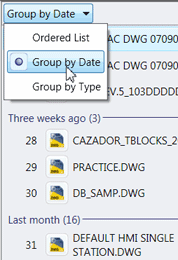
One of my customers had to point it out to me, but in the Menu Browsers of AutoCAD 2009 (on the right) and AutoCAD 2010 (below), you have that same ability. In A2009, when using the Recent Documents option, the default is Ordered List. However if you have been away from the office a few days or have lots of drawings you're working on, the Group By Date feature is pretty helpful.
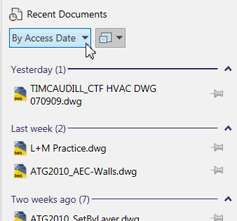 An identical feature is in AutoCAD 2010, but they refined the user interface a wee bit to be a little more obvious. The Recent Documents option (now positioned at the top of the drawing list) is emphasized and the feature is now called By Access Date.
Add this to the coverage in June of setting the number of drawings displayed to something other than the decades-old value of 9, and this Menu Browser is starting to get a personality.
The Basics
Customizing Quick Properties
 The difference between the regular Properties window and the Quick Properties window is one of customizability and how quickly it can be accessed. Since a significant portion of our AutoCAD life is spent editing drawings, Quick Properties may serve to provide the productivity boost you need.
Note: If you would like to have words back on the Status bar, rather than the icons, right-click on any icon on the Status bar — Snap, Grid, Ortho, etc. — then click “Use Icons” to effectively disable the icons and display words.
To see how Quick Properties works, open a drawing you have been working on recently and then take a look at the feature reviews.
Reviewing Quick Properties
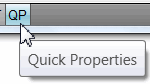
 On the Status bar, click QP to enable the Quick Properties feature.
Select an object in the drawing. In this example I clicked on a dimension.
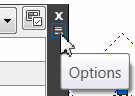
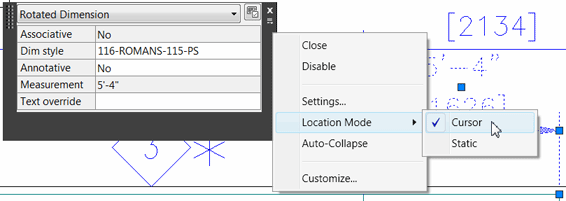
In the upper right corner click the small Options icon to display the shortcut menu.
The default Location Mode of Cursor is very convenient, but I would suggest you turn off the Auto-Collapse mode; it just seems counter-productive for a feature that's "Quick".
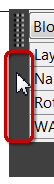 Note: The Quick Properties window can be moved by clicking and dragging from either of the side borders (curiously, not from the bottom border).
Press Esc, then click on another object in the drawing to display the quick properties exclusively for that object. If you select more than one object while in the Quick Properties, similar to the Properties window, the word "All" will be displayed and the selected objects will be available from the drop-down list.
Down on the Status bar, right-click on the QP item, then click Settings to open the Drafting Settings dialog box on the Quick Properties tab. Now that you understand a bit more about the Quick Properties mechanics, you can adjust those settings as you see fit.
Customizing the Quick Properties Content
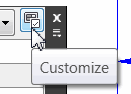 To customize the Quick Properties content based on the object selected, click the Customize icon in the upper right corner to open the Customize User Interface dialog box with the Quick Properties information displayed on the right.
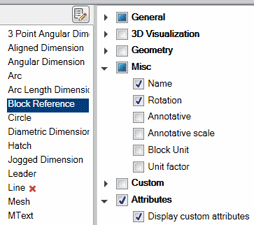 Similar to configuring the content displayed for Rollover Tips (see Michael's Corner, June 2009), select an object type from the list on the left to display the various property groupings. In this example, I clicked on the object type Block Reference.
For many of my customers, it would be convenient to see attribute-related information. In the figure, in addition to the Layer information that I have checked under General, I refined the properties under Misc. and checked the box for Attributes.
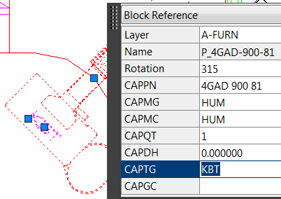 In addition to being informative about the object selected, I think you will find it easier to change the values for the enabled property fields than you can from in the default Properties window.
Left Field
"News": So I'm walking through the mall with our son the other day, and somehow the origin of the word "news" came up and he said it's from North, East, South, and West; the things that are going on around all points of the compass. But if you Google that origin, there's something boring in there like they took the phrase "new things" and added the "s" from "things" to the word "new" and came up with "news". In the global view of things, I'm stickin' with my kid.
Donate to CADTutor
If you found this article useful, you might like to consider making a donation. All content on this site is provided free of charge and we hope to keep it that way. However, running a site like CADTutor does cost money and you can help to improve the service and to guarantee its future by donating a small amount. We guess that you probably wouldn't miss $5.00 but it would make all the difference to us.
Note from Michael: I want to thank all of my customers for continuing to retain my training services (some for over three decades!) and let you know your donations do not go to me personally, but to the ongoing maintenance of the CADTutor ship as a whole and to support the yeoman efforts of my friend and CADTutor captain, David Watson, to whom I am grateful for this monthly opportunity to share a few AutoCAD insights.
Share this page:


The Basics
- Dual Dimensions in a Dim…
- UCSICON Options
- "Best of" Basics: Irreg…
- Tool Palette Basics
- Original Dimension Value
- Possible Solutions to th…
- Avoid Using 'Standard' i…
- Shorten the Plot Scales…
- Update the Source File B…
- User Increment Angles fo…
- Drawing Information
- 'Sign Language'
- Rotate with the Copy Opt…
- Use the INSERT Osnap on…
- To or From the Current L…


