

Uploading Files with WS_FTP
See also, Converting Autio CD Tracks to MP3 Files
Introduction
 Microsoft PowerPoint has always been able to play audio tracks from a CD as part of a slide show. To do this, put an audio CD in the CD drive and select Insert
![]() Movies and Sounds
Movies and Sounds![]() Play CD Audio Track… from the pull-down menu. You can then control which track is played by making the relavant settings in the Movie and Sound Options dialogue box, shown on the right.
Play CD Audio Track… from the pull-down menu. You can then control which track is played by making the relavant settings in the Movie and Sound Options dialogue box, shown on the right.
The problem with this approach is that you need the original CD and a computer with a CD drive in order to play the show. This is particularly problematic if you want to run the show from a CD. A much better option is to convert the audio CD tracks to MP3 files and then play the files as part of the show rather than the original audio CD. This will make your shows much more portable and less likely to suffer from glitches.
There are a number of ways you can convert CD tracks to MP3 files, but if you are unsure about this, look at the Converting Audio CD tracks to MP3 Files tutorial for step-by-step instructions.
Inserting the MP3 File
This tutorial assumes that you already have some MP3 files ready to use. Place these files in the same folder as the presentation file you are currently working on. See Playing the Audio Track, below for more details.
In your PowerPoint presentation, find the slide to which you would like to add an audio track. Then select Insert![]() Movies and Sounds
Movies and Sounds![]() Sound from File… from the pull-down menu. Find the MP3 file you want using the Insert Sound dialogue box and click the OK button. You are then asked if you want the sound to play automatically within the slide show. Click Yes or No as appropriate. You can always change this later if you are not sure.
Sound from File… from the pull-down menu. Find the MP3 file you want using the Insert Sound dialogue box and click the OK button. You are then asked if you want the sound to play automatically within the slide show. Click Yes or No as appropriate. You can always change this later if you are not sure.
![]() You will see a small icon appear in the center of the slide. This icon represents the sound file. Deleting the icon removes the track from the presentation. You can move the icon to another part of the slide if you need to see it during the slide show or you can move it off the slide if you want to hide it during the show. Just click and drag to move it.
You will see a small icon appear in the center of the slide. This icon represents the sound file. Deleting the icon removes the track from the presentation. You can move the icon to another part of the slide if you need to see it during the slide show or you can move it off the slide if you want to hide it during the show. Just click and drag to move it.
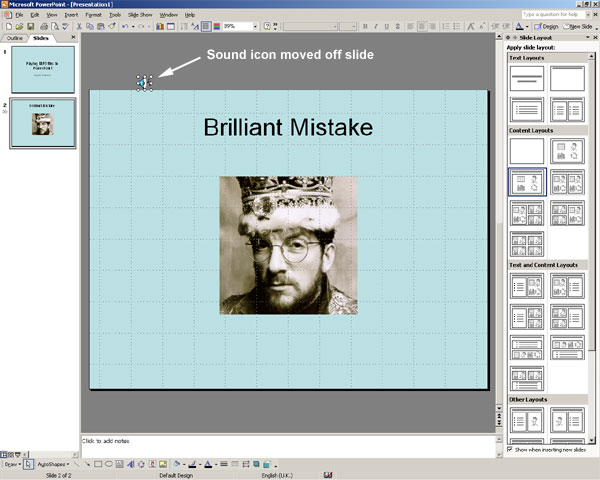
There is another way to hide sound icons which we will come to later but moving the icon off slide is probably the simplest method.
Controlling Playback
PowerPoint 2002 has a number of advanced features that you can use to control when and how the track is played.
To control when the track is played, you must specify the trigger event that causes this to take place. Once you have done this, you can control how the track is played by changing parameters such as the start time and the end time.
You can control when and how animation events occur using the Custom Animation panel. To display this panel, select Slide Show![]() Custom Animation… from the pull-down menu or right-click on the sound icon and select Either way, the panel on the right of the screen changes to show a list of all animated objects on the slide. Since a sound file is, by its very nature, an animated object, it shows up in the list and is identified by the file name.
Custom Animation… from the pull-down menu or right-click on the sound icon and select Either way, the panel on the right of the screen changes to show a list of all animated objects on the slide. Since a sound file is, by its very nature, an animated object, it shows up in the list and is identified by the file name.
When (trigger)
Effectively, there are three possible triggers for any animation effect, including the playing of audio tracks. These are, On Click, With Previous and After Previous. If the start trigger is set to "On Click", the track will begin to play when the mouse button is pressed. If the start trigger is set to "With Previous", the track will begin to play at the same time as the previous animation event. Using this trigger, it is possible to have the track play while some other object or objects are moving on the slide. If the start trigger is set to "After Previous", the track will begin to play after the previous animation event has finished. However, this trigger has an additional parameter that allows you to set a delay time in half second increments. This means that, for example, you could have the track play 4.5 seconds after the previous event has finished.
When you insert a sound file, the trigger is set to On Click if you choose not to start the track automatically and it is set to After Previous with a delay of 0 seconds if you choose to start it automatically. The current start trigger is displayed at the top of the Custom Animation panel in the "Start" drop-down list. It can be changed by clicking the down arrow and selecting a different option from the list.
 If the start trigger is set to After Previous, you can set the delay time by clicking the down arrow next to the filename in the animation list and selecting from the menu (see illustration above). This displays the Timing tab of the Play Sound dialogue box, shown on the left.
Use the Delay option to set the number of seconds that the audio track will wait, after the previous event has ended, before playing commences.
The other useful option to look at here is Repeat. You can use this to control the number of times a sound is repeated. This may not be particularly useful for lengthy audio tracks but it can be useful when working with short sound effects.
How (effect)
To control how the track is played, click on the down arrow located to the right of the sound file name on the Custom Animation panel and select from the menu. This will display the Effect tab of the Play Sound dialogue box, shown below.
The Effect tab is used to control the start and stop timings for the track and this can be activated in a number of different ways.
You can choose to start a track "From beginning", "From last position" (assuming that it has already started and then stopped) or "From time". The From time option can be used to start playing from a particular time location within a track to the nearest second. The time shown "00:00" is in minutes and seconds.
You can also choose how to stop playing the track. The audio track will not automatically play until it reaches its end, it will be ended by some event. The Stop playing option allows you to control this event. A track can be stopped On click, After the current slide or After a specified number of slides. The track will continue to play until it reaches the specified event, however, the track will stop automatically if it comes to its end before the stop event is reached.
The sound settings section of the dialogue box can be used to control the volume of the track and the visibility of the sound icon while the show is playing. You can use this Hide while not playing option as an alternative to moving the icon off slide.
Playing the Audio Track
Once you have made all the various settings, there are no special actions that need to be taken. Provided that you have a sound card in your computer and provided that it is connected to some speakers and that the speakers are turned on, you will hear the audio track play during the slide show.
There is one final point to be made and it is important because it often catches out newcommers to PowerPoint. You are probably aware that when you insert an image into a slide, that image forms an integral part of the presentation file. This is not how sound and movie files are treated. When you insert a sound file into a slide, a link is made to the sound file. The sound does not form an integral part of the presentation file when it is saved. If you want to move your presentation to another computer, you must also move the sound file otherwise no sound will be heard. When a trigger for a sound file is reached during a show, PowerPoint looks for the sound file where it was located when it was first inserted. If the file is not found, the sound will not be played.
Generally, it is good practice to store your sound and movie files in the same folder as the associated presentation file. This means that you can happily move or copy the folder and be sure that the presentation file and all its linked files stay together, even when moving to a different computer or copying to CD.
Donate to CADTutor
If you found this tutorial useful, you might like to consider making a donation. All content on this site is provided free of charge and we hope to keep it that way. However, running a site like CADTutor does cost money and you can help to improve the service and to guarantee its future by donating a small amount. We guess that you probably wouldn't miss $5.00 but it would make all the difference to us.
Local Navigation
Sponsored Links
The Basics
- Dual Dimensions in a Dim…
- UCSICON Options
- "Best of" Basics: Irreg…
- Tool Palette Basics
- Original Dimension Value
- Possible Solutions to th…
- Avoid Using 'Standard' i…
- Shorten the Plot Scales…
- Update the Source File B…
- User Increment Angles fo…
- Drawing Information
- 'Sign Language'
- Rotate with the Copy Opt…
- Use the INSERT Osnap on…
- To or From the Current L…


