

Standard none mapped materials
Introduction
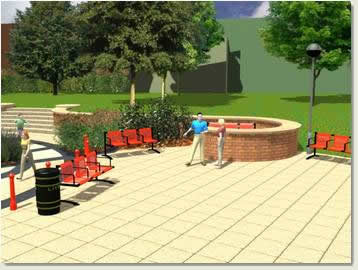
Before exploring materials it is worth examining what type of objects need what type of materials. Materials for infrastructure and environmental projects include surfaces (tarmac, paving, bricks, mulch, grass etc), edges (surface edge details, kerbs, coping for walls, steps etc) and objects (benches, lighting columns, litter bins, houses etc).
Most of these objects use the Standard type material. This material contains parameters that allow you to create many effects for paint, plastic, basic glass and alter properties such as the self illumination and transparancy with just the shader parameters (explained below) alone. Or 'procedural' maps or 'image' maps can be added to the material for an increased variety of effects. Multi / Sub-Object materials hold a number of separate sub-materials for use on objects such as lighting columns. Multi / Sub-Object materials are used on these objects because they are made of different elements requiring separate materials assigned to each part. Any loft object used for edges will have its material mapping (how the map within the material is positioned on the object) edited on the Modify Panel in the Loft parameters
The following tutorials focusing on materials look at the main types of materials for infrastructure and environmental work and explain the basic steps for creating and assigning materials to different types of objects in the scene
Download Sample Data
kf406_files.zip (1.4mb)
Paint and Metal
Standard none mapped materials are suitable for paint, plastics, metal, basic glass type objects. By choosing the correct shader, the most suitable parameters can be used to create the most appropriate effects. In this exercise you will create and apply paint and metal materials to bollards and litter bins
- Open kf406_01.max. This is the scene from the previous module with lighting and a camera
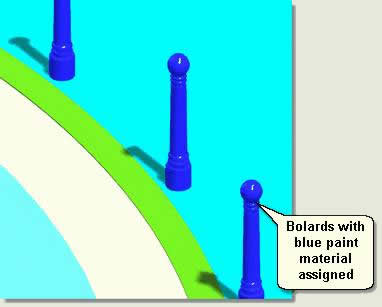
Bollards
- Open the Material Editor and select the first sample window
- Change the Material Name to Blue paint
- Choose the Anisotropic shader
- Click the Diffuse colour swatch to open the Colour Selector. Choose a blue colour with suitable whiteness
- Change the Specular Level to 80 and the Glossiness to 70. Notice the sample window and adjust accordingly
- Select all the bollards in the scene and Assign Material to Selection
Litter Bins
- Open the Material Editor and select the second sample window
- Change the Material Name to Grey Shiny Paint
- Choose the Metal shader
- Click the Diffuse colour swatch to open the Colour Selector. Choose a light grey colour with suitable whiteness
- Change the Specular Level to 120 and the Glossiness to 70. Notice the sample window and adjust accordingly
- Select the two bins in the scene and Assign Material to Selection
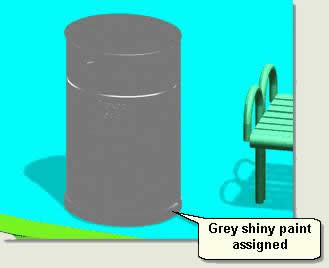
- Keep the Material Editor open and change the colour and other parameters to adjust the look of the litter bins
Donate to CADTutor
If you found this tutorial useful, you might like to consider making a donation. All content on this site is provided free of charge and we hope to keep it that way. However, running a site like CADTutor does cost money and you can help to improve the service and to guarantee its future by donating a small amount. We guess that you probably wouldn't miss $5.00 but it would make all the difference to us.
Local Navigation
Sponsored Links
The Basics
- Dual Dimensions in a Dim…
- UCSICON Options
- "Best of" Basics: Irreg…
- Tool Palette Basics
- Original Dimension Value
- Possible Solutions to th…
- Avoid Using 'Standard' i…
- Shorten the Plot Scales…
- Update the Source File B…
- User Increment Angles fo…
- Drawing Information
- 'Sign Language'
- Rotate with the Copy Opt…
- Use the INSERT Osnap on…
- To or From the Current L…


