Standard mapped materials - Image Maps
Introduction
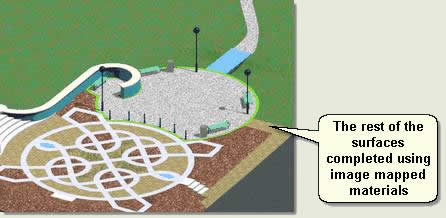
Image maps are applied to materials for many different purposes. Again, they have to be scaled and positioned on the object using a UVW Map modifier or a Map Scaler modifier. In this exercise you produce and assign materials for the rest of the surfaces using texture images
Download Sample Data
kf408_files.zip (395kb)
module_4_maps.zip (5.2mb)
- Open kf408_01.max. This follows on from the previous tutorial
Meadow
- In the Material Editor select the next available sample window
- Name the material Grass
- Choose the Anisotropic shader
- Click the Map button to the right of the diffuse colour swatch to drop to the map level. This opens the Material/Map Browser so you can choose the type of map you need for the job
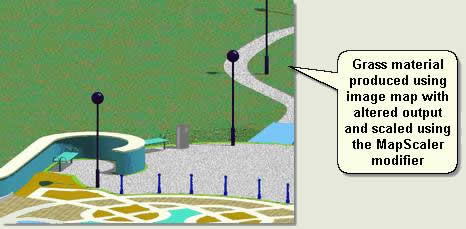
- Double click Bitmap. Navigate to the tutorials Maps folder and select Grass 11.jpg. This is an image of grass that has been optimised for tiling making it appear seamless when repeated over a large area. Press Open
- Press Go to Parent button and Show Map in Viewport button then select Meadow and Assign Material to Selection
- In the Material Editor map coordinates parameters make sure Real-World Scale is checked Off and Size is 0.1,0.1
- Test render and notice that the grass is rather light in colour and is not scaled correctly (the pixels are too large)
- Apply a MapScaler modifier. Change the Scale to 3 and test render. The grass looks better scaled
- To cahnge the brightness and colour of the grass: In The Material Editor press the Map button to the right of the diffuse colour swatch to go to the image Map level
- Output rollout > Change the RGB Level to 0.7. This will show the map going darker in the sample window and will render darker. You may also want to adjust the colour of the grass if needed using the Enable Color Map checkbox with RGB selected. Select R or G or B and move the right hand nodes up or down
Enhancements
- Left click and drag the Map button to the right of the diffuse swatch down to the Map button to the right of the Specular swatch (if prompted instance this). This adds an element of highlight to the lighter areas
- In the Maps rollout left click and drag (instance) the Diffuse Map to the Bump Map channel, check on and enter 150 in the spinner. This adds an element of bump to the material

Planting Beds, Car Park, Maze surfaces and Pavement
- Repeat the above routine. However for:
- Planting Beds use MULCH.jpg
- Car park use Tarmac 01.jpg
- Maze path use Aggregate 01.jpg
- Maze cobbles use Aggregate 04.jpg
- Maze mosaic use Aggregate 01b
- Pavement just assign the Flags-red-bricksmap material
- Building path just assign the Flags-red-bricksmap material

Bridge
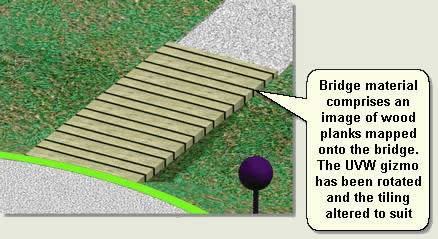
- Finally use Wood-06b for the bridge material
- Rotate the UVW Map gizmo 90 degrees on the Z axis and change the V tiling to 1.7

NOTE: Image maps are also used for mapping images on the sides of buildings and for images of trees and shrub, people etc when used with an opacity map. The ability to alter the mapping of images on different parts of an object (such as the front and sides of a building) is described in the next section - 'The Mapped Cube'. Opacity mapping techniques, however, are not covered in Key Fundamentals
Donate to CADTutor
If you found this tutorial useful, you might like to consider making a donation. All content on this site is provided free of charge and we hope to keep it that way. However, running a site like CADTutor does cost money and you can help to improve the service and to guarantee its future by donating a small amount. We guess that you probably wouldn't miss $5.00 but it would make all the difference to us.
Local Navigation
Sponsored Links
The Basics
- Dual Dimensions in a Dim…
- UCSICON Options
- "Best of" Basics: Irreg…
- Tool Palette Basics
- Original Dimension Value
- Possible Solutions to th…
- Avoid Using 'Standard' i…
- Shorten the Plot Scales…
- Update the Source File B…
- User Increment Angles fo…
- Drawing Information
- 'Sign Language'
- Rotate with the Copy Opt…
- Use the INSERT Osnap on…
- To or From the Current L…


