

Stage 5: Create Houses, Roadlines and Fences
Introduction
These elements of the scene are classed as 'Objects'. Objects are items that sit on the landform terrain (lamp posts, bollards, houses etc) or conform to its surface (fences for example). They are usually positioned in AutoCAD using blocks (lamp posts, bollards etc) or lines (closed polygons for house outlines, road lines or polylines for fence lines). This stage describes the process for creating houses (including roofs), fences and road lines
5.1 Create Houses
The polylines for houses and roadlines need to be imported so that they are created as separate entities. This is because the houses need to be placed at different heights on the surface (automatically using Key 3D Move Over) and the roadlines need to be configured individually using Key 3D Roadlines. To import these lines as individual entities the Legacy AutoCAD Import option is used
Firstly, just the layers required for import need turning On in AutoCAD
- Open Project for 3D 03.dwg in AutoCAD and turn all layers Off apart from O_Roadline and O_Houses
- Save the drawing as Houses and Roadlines.dwg
- Close AutoCAD
- Carry on from the previous scene or open ACAD to 3D Stage 4.max in MAX/VIZ
- File > Import. Choose Files of Type: Legacy AutoCAD (*DWG) and select Houses and Roadlines.dwg
- Check Merge objects with current scene when prompted and press Ok
- On the Import AutoCAD DWG File dialog check just Skip off and frozen layers and make sure Weld is unchecked
- Press Ok to import the houses and roadlines
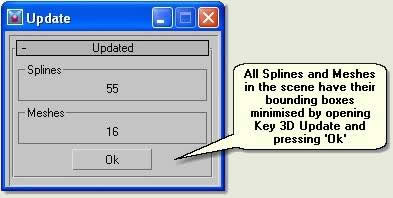
The houses and roadlines will have rather large bounding boxes (sometimes an issue with data imported from AutoCAD). To minimise the bounding boxes of all objects do the following:
- Open Key 3D Model Objects dropdown Menu > Update
- Press Ok and notice that now when selected any object's bounding box fits the object tightly
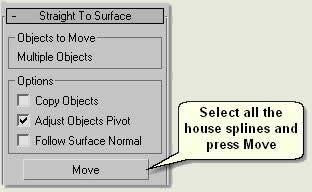
- In the User viewport select all the house splines using the Select by Name dialog and open Key 3D Straight to Surface

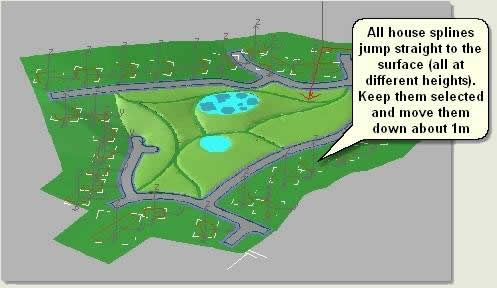
- Keep options as default and press Move. The house splines will all move to the surface
- Keep them selected and move them all down 1m using Move Transform Type-in and Offset:World. This makes up for any gaps between house and sloping land
NOTE: The house splines could have been moved to their correct heights and included in the spline model from which the terrain was created. This would give a correct 'platform' for each house. The house splines plus any level area boundaries (for paths and adjoining areas around a houses) can be included. Then, the house splines would sit on a level area. In this case they are being used for broad brush context modelling and so a more rudimentary method is being used
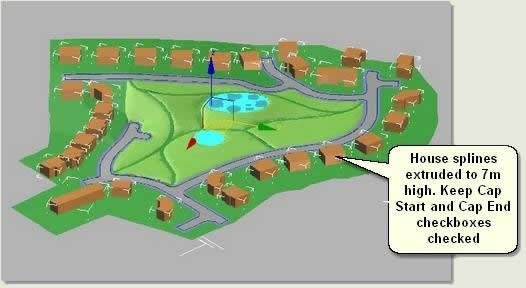
- Keep the house splines selected and apply an Extrude modifier at an Amount of 7
- Keep the houses selected and use Edit > Clone dialog to Copy clone them
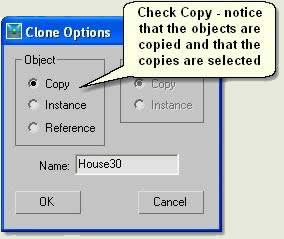
The houses are copied and the copies are selected
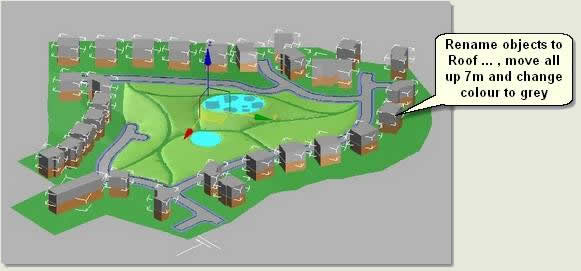
- Keeping the copies selected use the Rename dialog to rename the copies Roof01 to Roof29
- Keep the roofs selected and move them all up 7m using Move Transform Type-in and Offset:World
- Change the colour to grey
- Again, keeping the roofs selected, in the Modify Panel remove the Extrude modifier from all the roof objects (press the dustbin icon below the modify stack window)
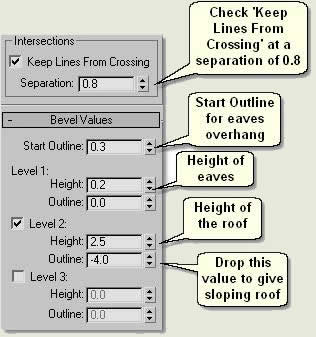
- Apply a Bevel modifier to all the roofs with the following settings:
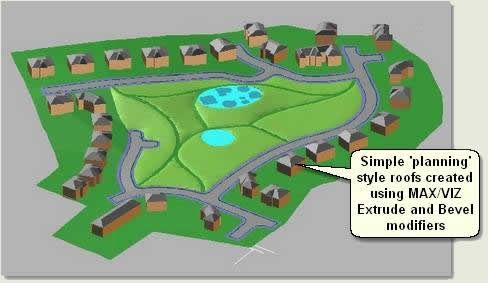
- Select all houses and roofs and Convert to Editable Mesh
- Finally create a Group from all Houses and Roofs called 'Houses'
5.2 Create Roadlines
Roadlines are created using Key 3D Roadlines which produces 2D segmented roadlines. Roadline presets for length, width and spacing can be applied and offsets adjusted to butt up to other roadlines. The roadlines can be created as straight or curved 2D splines before using Key 3D Drape to drape the lines over the road surface. Finally the closed roadline segments are extruded slightly to produce 3D roadlines conforming to the surface
NOTE: Continuous roadlines (not applicable in this example) are created using spline sub-object editing - the Outline operation in spline sub-object mode
- Carry on from the previous scene or open ACAD to 3D Stage 5a.max
- Select all the Roadbaseline splines (25) and Surface_B_Road and Isolate Selection
- In the Top viewport zoom to the junction shown below and select Road baseline16
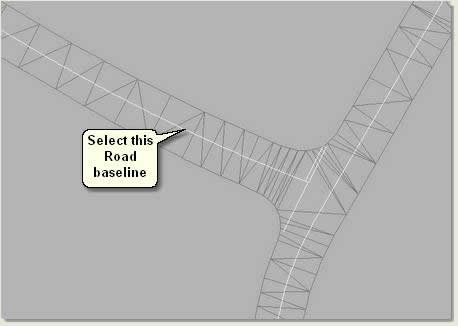
- Open Key 3D Roadlines
 The name of the spline appears under Name
 - Press Preset Browser and select Preset 1008
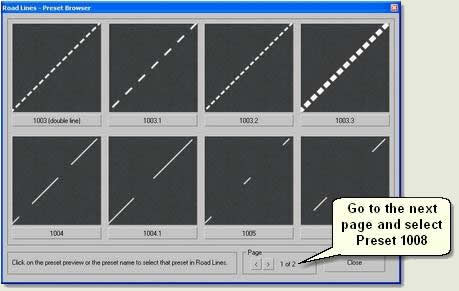
- Press Apply to apply the roadline preset to the base roadline

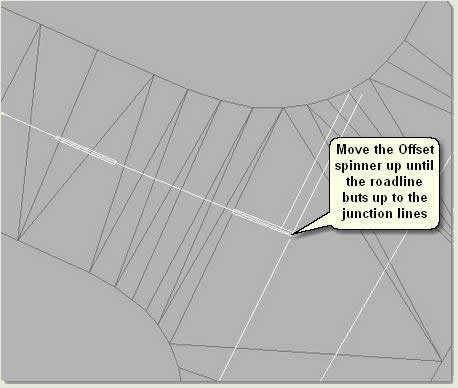
- Zoom to the junction and increase the Offset amount so that the roadline butts up to the junction lines
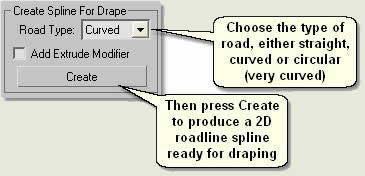
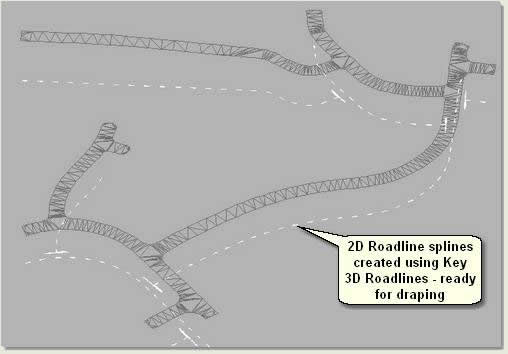
- When satisfied that the roadline is in the correct position choose the Road Type: 'Curved' under Create Spline For Drape
- Press Create to create a 2D roadline ready for draping. If the Road Type is curved or circular a progress message appears - this is because extra vertices are added on the roadline segments to give a curved segmented roadline
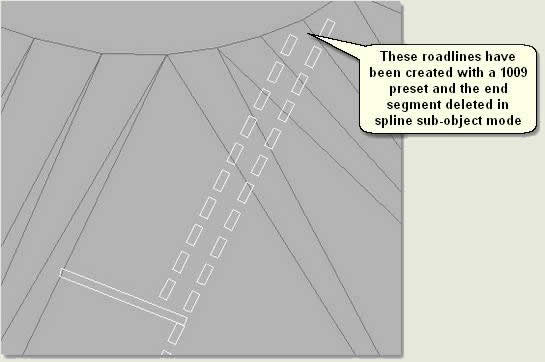
- Delete the base roadline and repeat the routine for the junction lines. These use the Preset 1009
- Once created, some segments may be removed in spline sub-object mode
NOTE: Roadlines must be created separately and cannot be attached together prior to applying a preset
- Repeat this procedure for all remaining roadlines, creating 2D splines with 1008 (curved) and 1009 (straight) presets and making sure that all roadlines butt up to each other using the Offset spinner
- Attach all the roadlines together to make one editable spline and rename Roadlines
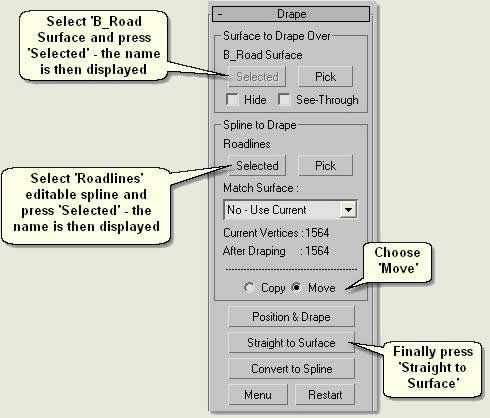
- Select B_Road Surface and open Key 3D Drape

- Under Surface to Drape Over press Selected. B_Road Surface is then displayed
- Select Roadlines editable spline and under Spline to Drape press Selected. Roadlines is then displayed
- Keep the Match Surface settings on No - Use Current
- Select Move so that the spline will move straight up to the surface automatically
- Finally, press Straight to Surface to drape the roadline splines over the road surface
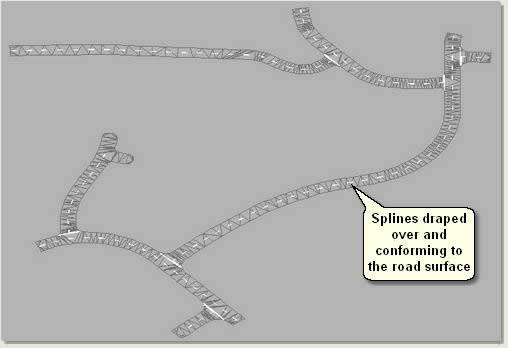
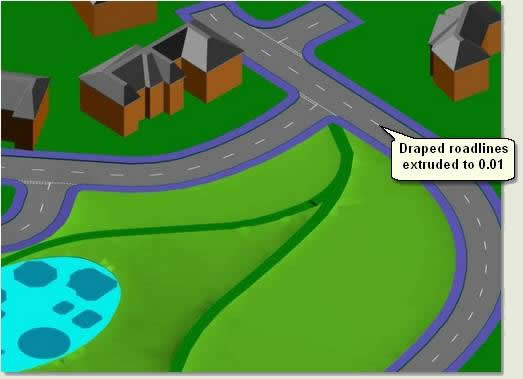
- Apply an Extrude modifier at a height of 0.01. This will create 3D roadlines conforming to the road surface
5.3 Create House Fences
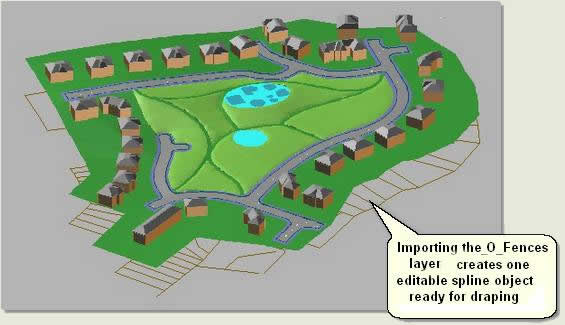
The house fence lines can be imported using the more comprehensive AutoCAD DWG/DXF Import Options dialog. This will import the lines as one object (ie not separate lines). This is what is required here as the lines will be draped over the surface in one operation using Key 3D Drape
- Carry on from the previous scene or open ACAD to 3D Stage 5b.max
- File > Import. Choose Files of Type: AutoCAD Drawing (*DWG,*DXF) and select Project for 3D 03.dwg
- On the AutoCAD DWG/DXF Import Options dialog Layers Tab check O_Fences
- On the Geometry Tab check Weld and keep all other checkboxes unchecked
- Press Ok and notice that one object (ie not separate splines) has been imported called 'Layer:O_Fence'.
- Rename the fence lines to 'O_Fence'
- Select Surface_B_Site and open Key 3D Drape

- Under Surface to Drape Over press Selected. Surface_B_Site is then displayed
- Select O_Fence editable spline and under Spline to Drape press Selected. O_Fence is then displayed
- Keep the Match Surface settings on No - Use Current
- Select Move so that the editable spline will move straight up to the surface automatically
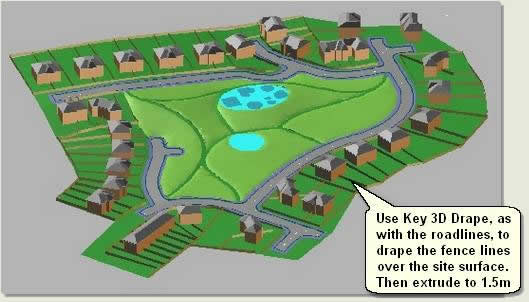
- Press Straight to Surface to drape the fence splines over the site surface
- Finally, apply an Extrude modifier to a height of 1.5
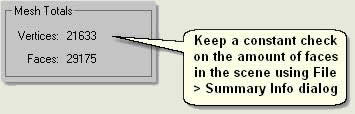
- Check how many faces exist in the scene using File > Summary Info dialog
TIP: Select and right click over any object and select Properties to display information about objects including the face count and name of material assigned
Donate to CADTutor
If you found this tutorial useful, you might like to consider making a donation. All content on this site is provided free of charge and we hope to keep it that way. However, running a site like CADTutor does cost money and you can help to improve the service and to guarantee its future by donating a small amount. We guess that you probably wouldn't miss $5.00 but it would make all the difference to us.
Local Navigation
Monday
21st April 2025
Sponsored Links

The Basics
- Dual Dimensions in a Dim…
- UCSICON Options
- "Best of" Basics: Irreg…
- Tool Palette Basics
- Original Dimension Value
- Possible Solutions to th…
- Avoid Using 'Standard' i…
- Shorten the Plot Scales…
- Update the Source File B…
- User Increment Angles fo…
- Drawing Information
- 'Sign Language'
- Rotate with the Copy Opt…
- Use the INSERT Osnap on…
- To or From the Current L…


