Jump to content

Search the Community

Showing results for tags 'connections'.

  • Search By Tags

    Type tags separated by commas.
  • Search By Author

Content Type


Forums

  • CADTutor
    • News, Announcements & FAQ
    • Feedback
  • AutoCAD
    • AutoCAD Beginners' Area
    • AutoCAD 2D Drafting, Object Properties & Interface
    • AutoCAD Drawing Management & Output
    • AutoCAD 3D Modelling & Rendering
    • AutoCAD Vertical Products
    • AutoCAD LT
    • CAD Management
    • AutoCAD Bugs, Error Messages & Quirks
    • AutoCAD General
    • AutoCAD Blogs
  • AutoCAD Customization
    • The CUI, Hatches, Linetypes, Scripts & Macros
    • AutoLISP, Visual LISP & DCL
    • .NET, ObjectARX & VBA
    • Application Beta Testing
    • Application Archive
  • Other Autodesk Products
    • Autodesk 3ds Max
    • Autodesk Revit
    • Autodesk Inventor
    • Autodesk Software General
  • Other CAD Products
    • BricsCAD
    • SketchUp
    • Rhino
    • SolidWorks
    • MicroStation
    • Design Software
    • Catch All
  • Resources
    • Tutorials & Tips'n'Tricks
    • AutoCAD Museum
    • Blocks, Images, Models & Materials
    • Useful Links
  • Community
    • Introduce Yourself
    • Showcase
    • Work In Progress
    • Jobs & Training
    • Chat
    • Competitions

Categories

  • Programs and Scripts
  • 2D AutoCAD Blocks
  • 3D AutoCAD Blocks
  • Images
    • Backgrounds

Find results in...

Find results that contain...


Date Created

  • Start

    End


Last Updated

  • Start

    End


Filter by number of...

Found 2 results

  1. Hi, everybody I just want to ask how to make my drawing as region that cover the close area. When i select the circle object and tooth object, it not become a region . I already connect all the line but its not working.Hope that everybody in here can help. 9_8 autocad kecikkkan tooth.dwg
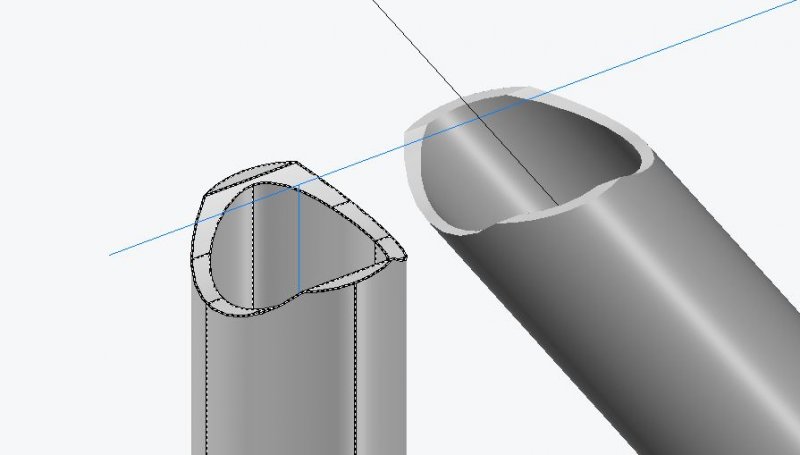
  2. I have been struggling with this issue for weeks using Acad2012, Win 7. To draw the cope end I subtract one tube from the other, this creates a taper from wall thickness t at the intersection of the inner tube face to zero at the intersection of the outer wall face. This loss of wall thickness is not ideal. To get rid of this less than full thickness material I create a slicing plane through intersection of non-cut tube 1 and the inner wall of the tube to be cut, I establish this point by drawing a 2D cross section. I realise this a bit of a hack and it never works out spot on as the slicing plan never seems to match exactly the intersection point of the 3D tube inner wall. I have tried to get a work around. ie: - drawing a tube inner radius only subtracting from that then shelling-this only re creates the taper. -offsetting the intersection edge of the inner wall and trying to project onto outer at 90deg-this does not offset correctly due to the complex geometry. I was hoping the COPE file from SEANT post in the Customisation forum may answer my problems but I cannot get to work and would like to find out if this can be acheived using in built functions or methods? If anyone can provide me some help with the following I would be really grateful: 1. How to create a mitre maintaining full wall thickness. 90 degree intersections. 2. How to create a mitre maintaining full wall thickness. Non 90 degree intersections. 3. How to create a mitre maintaining full wall thickness. Tubes angled in 2 planes ie: for triangular space truss. 4. How to create a mitre maintaining full wall thickness. Tubes angled in 2 planes centres lines not coincident ie internal members offset to enable 2/3 to meet at same node. 5. How to deal with the above when using non round tubes.
×
×
  • Create New...