Leaderboard

Popular Content
Showing content with the highest reputation on 09/19/2022 in all areas
-
You do realize the reason for the lisp is because it isn't possible to create a hatch like this?2 points
-
It didn't solve world hunger either!2 points
-
This is an AutoCAD Forum, not a Manual Drafting Technique Forum. You need to find a manual drafting course if you seek to learn these methods. Seemingly, you have posted the instructions you seek, yet cannot understand. How do you expect someone to do any more on the internet? Ask a question on an AutoCAD Forum, you should expect AutoCAD solutions. You are getting extremely rude!2 points
-
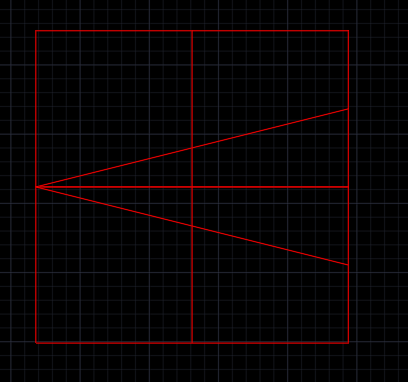
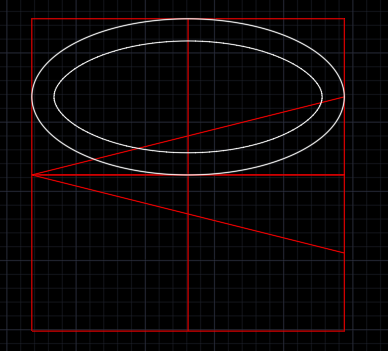
Can someone tell me please step-by-step (technical drawing) of how to draw 2D spring (please see the attached pics)? Thanks
 1 point
 -
Please correct your post to include the code in code tags. I have moved your thread to the AutoLISP, Visual LISP & DCL Forum. Please post in the correct forum.1 point
-
It is always a pity when negative feedback is posted about something that was given freely. The phrase 'looking a gift horse in the mouth' springs to mind. Did you read the working parameters at the beginning of the lisp file? Just open the file in a text reader, and you will see that the outcome is not a hatch. So how can you think that the scale can be altered? Perhaps you are voicing your discontent that the lisp does not do what you think it ought to do!1 point
-
You may need a (command "Pspace") to ensure not in model space. You can get extmin extmax of a layout as window select then move extmin to 0,0 for consistency I do this setting all layouts in one go.1 point
-
Hmm open Properties 1st (defun c:zzz ( / a) (setq a (ssget "X" '((0 . "*TEXT")))) (vla-sendcommand (vla-get-activedocument (vlax-get-acad-object)) "_.Select P ") ) Can then change lots of stuff. Yes may need the make style 1st.1 point
-
Like you LRM I did tech drawing in 1976 and got 100% on exam, would never go back to a pencil and paper now. Just a hint basty "I am not satisfied with the answer" if you criticise the answers your receiving then future answers may be very slim.1 point
-
The 4-arc "Isometric Circle with Compass" is a way to approximate the true isometric ellipse. The technique was developed many years ago before computers! Why do you seek to not use the features of AutoCAD but instead try to use methods intended for manual drafting? In 1974 when I was working for a CAD company that had a CAD system that could only draw arcs and lines I used the 4-arc to fudge an isometric drawing. We've come a long way since then!1 point
-
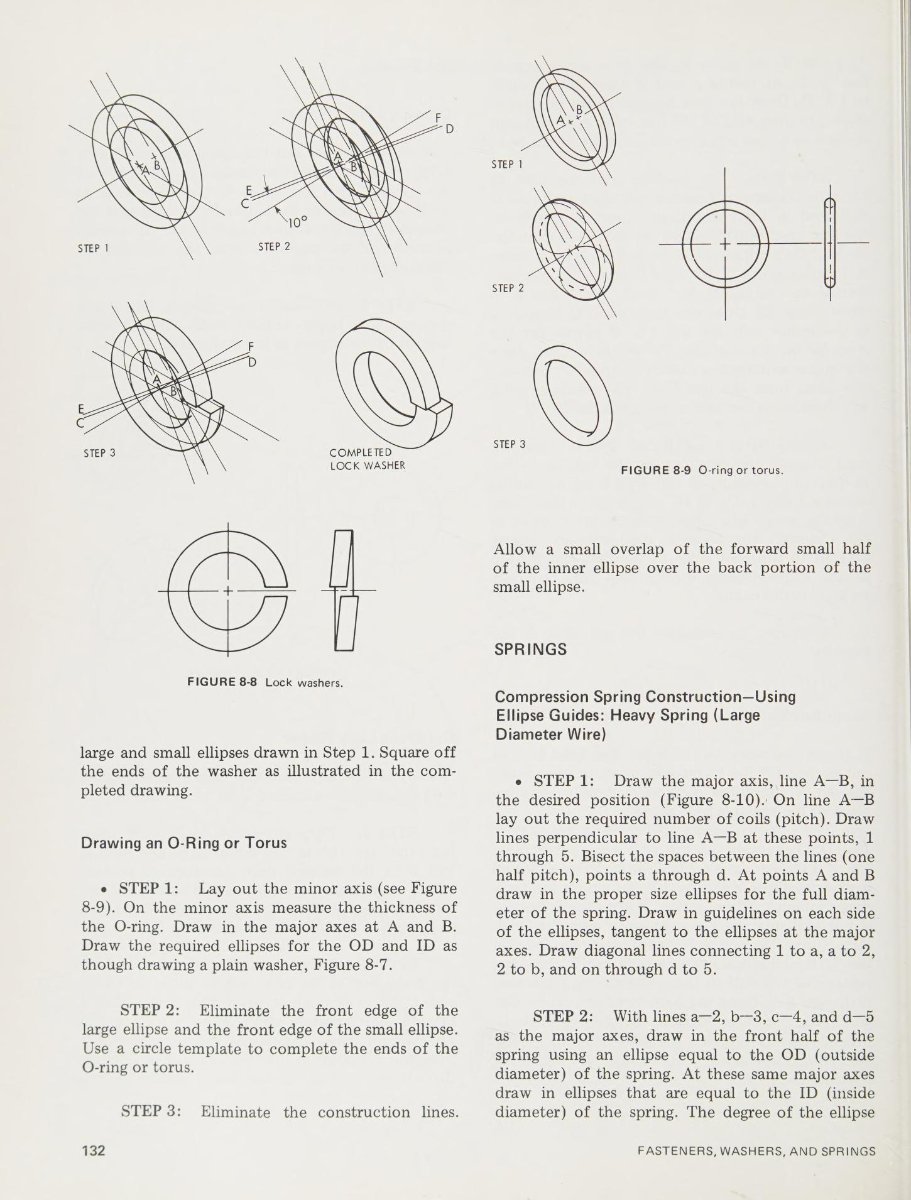
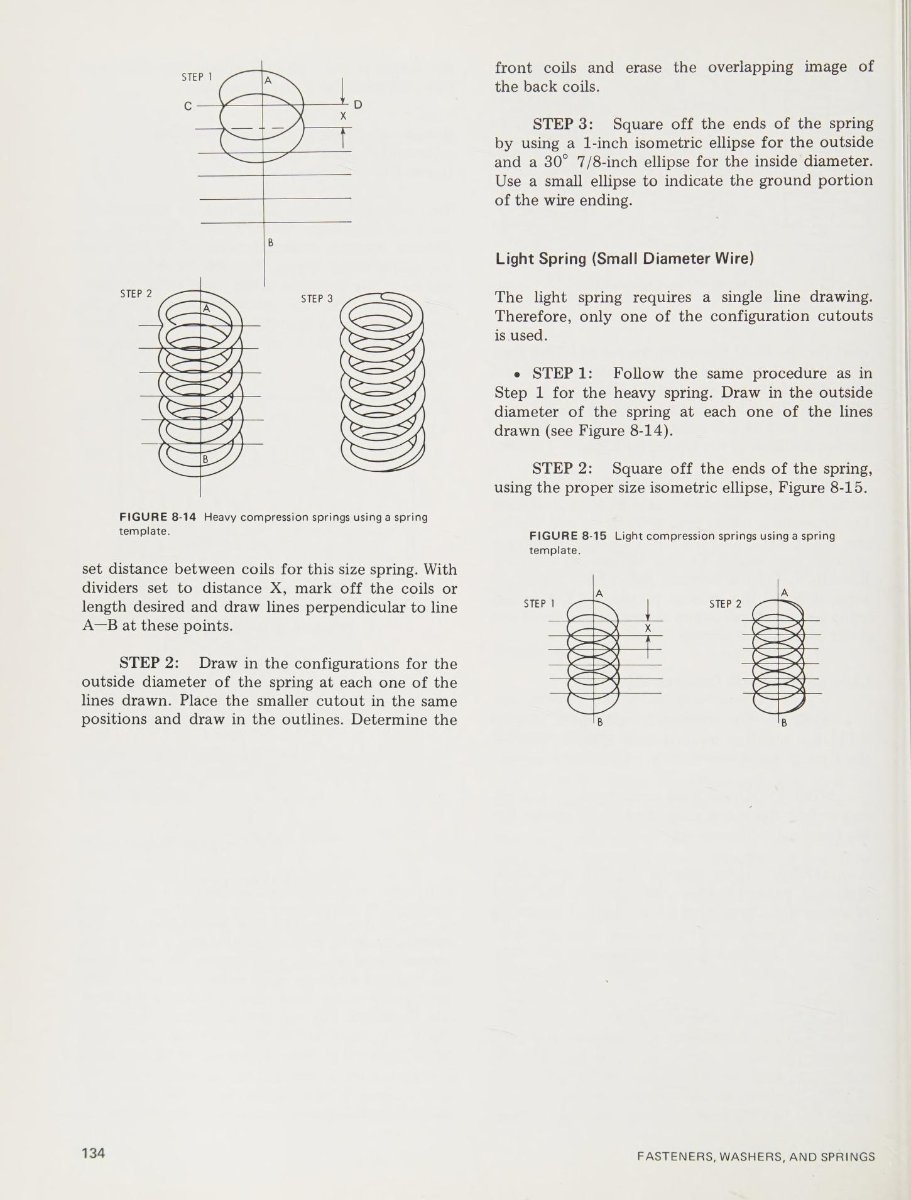
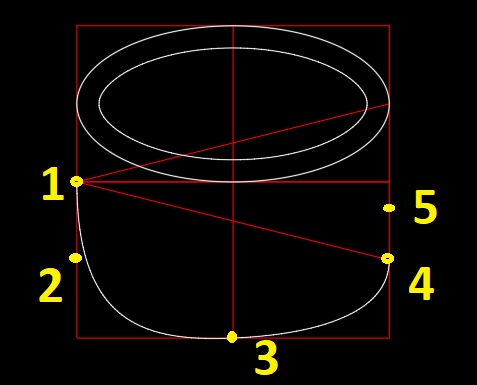
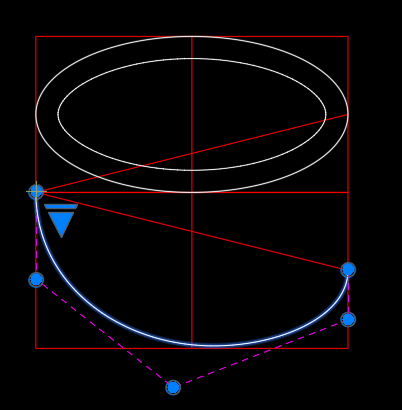
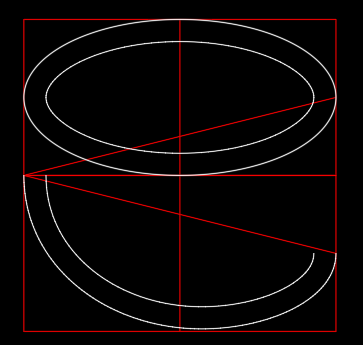
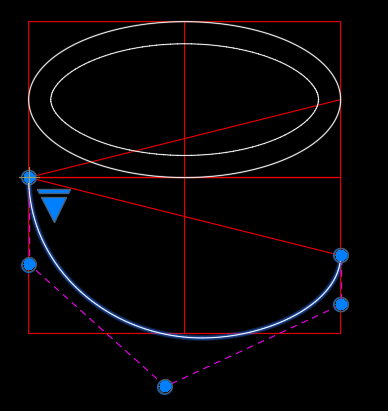
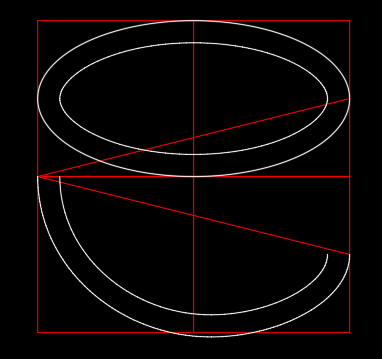
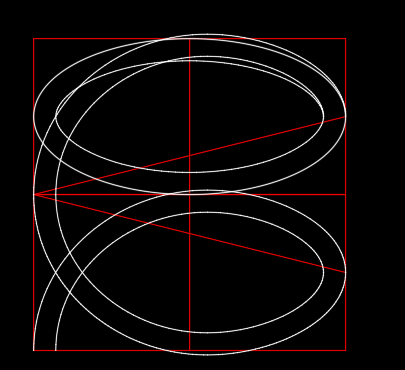
@batsy here are detailed instructions for drawing the spring using the 2D method you reference. Set osnaps to endpoint, midpoint, and nearest. Draw a rectangle of appropriate proportions, make a copy below it and draw the diagonals and vertical centerline as noted. Create an ellipse then and offset to it to yield: Create a spline with the Fit method by first click at 1, then type T (tangency) and click at 2, followed by a click at 3 and 4 then type T and click at 5. Using splinedit e (edite vertex) m (move) [Enter] (to advance to the second Control Vertex) move it up or down to adjust the radius of curvature at the start of the spline. Still in the edit spline mode type x [enter] 3 times to exit edit spline. Note, once you have moved a CV with editspline you can now more easily move CVs with using editspline. Select the spline and move the CVs to get the desired shape. Be sure to keep the 2nd CV and the next to the last CV on the vertical line of the rectangle. This will ensure that spline slope at the start and end are vertical. Adjust the middle CV so that the spline is just below the bottom of the rectangle. Create an offset to the spline with the same value used for the ellipse. MIrror the 2 curves about a the rectangle horizontal middle axis then copy the top 2 curves to the top rectangle. Copy or array the curves of the lower box. Edit with trim as needed. Note, the aspect ratio of the original rectangle will determine the level of spring compression.
1 point